

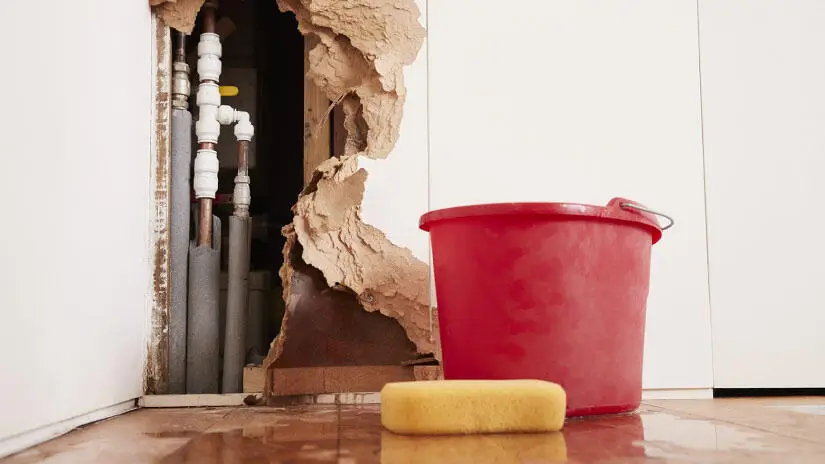
Portland’s housing mix includes early 1900s bungalows, midcentury ranches, and newer infill builds. That variety makes plumbing systems just as varied, from galvanized supply lines and crawlspace copper to modern PEX and slab branches. Hidden leaks often show up before you ever see dripping water. A musty cabinet under a kitchen sink, a stain on a living room ceiling below an upstairs bathroom, or a water heater pan with a faint sheen can point to trouble behind finishes. Because our region sees sustained rain and occasional cold snaps, it can be hard to tell if moisture is from weather, condensation, or an active leak. Knowing the telltale signs and quick checks can help you act before minor moisture becomes structural damage.
-
What a Hidden Leak Looks Like in a Portland House
Early signs tend to be subtle: a spinning water meter leak indicator when all fixtures are off, peeling paint on bathroom ceilings near a shower valve wall, or a soft spot in vinyl flooring around a toilet where a wax ring is failing. Outside, watch for a soggy strip between the water meter box and the house entry point, especially in dry weather. In older homes with raised foundations, a sweet or earthy odor in a crawlspace, fresh efflorescence on foundation walls, or a damp sill plate below a kitchen or laundry can point to a supply line pinhole or a weeping drain trap. Local resources that explain water systems and plumbing services for Portland homes can help you interpret these signals and decide when to escalate.
Scenario one: a 1920s bungalow shows a faint yellow halo on the living room ceiling directly under the upstairs tub. The likely suspects include the tub drain shoe gasket, a loose shower arm connection hidden behind the escutcheon, or splash intrusion through failed caulk at the tile surround. Scenario two: a newer ADU with PEX supply develops a warm stripe on a slab floor. That can indicate a hot water line leak under the slab, often noticed as continuously heated tile and a water heater that cycles more than usual.
-
Likely Sources by Fixture, Material, and Location
Supply side leaks often stem from aging angle stops under sinks, crimped or brittle toilet and faucet supply lines, or pinholes in copper where water chemistry or abrasion at hangers has worn the pipe. Galvanized risers can shed rust, causing low pressure and corrosion at threaded joints that eventually seep. Excessive pressure from a failing pressure reducing valve (PRV) can push past seals at washing machine hoses, dishwasher lines, and ice maker tubes, creating intermittent drips that pool inside cabinets. Outdoors, hose bibs without frost proof valves may crack behind the wall after a freeze, only leaking when the valve is opened in spring.
Drain side sources are different. A rocking toilet can crush a wax ring and wick sewage into subflooring, which shows up as staining on the ceiling below. A shower P trap with a loose slip nut can weep with each use, while a cast iron stack with hairline cracks may leave brownish vertical streaks on nearby framing. Sewer odors near a floor drain or laundry standpipe can signal a dry trap. Roots in a clay or concrete sewer lateral may not leak water into the home, but they can slow drains, back wastewater into low fixtures, and create foul smells that are often mistaken for a clean water leak.
-
Checks You Can Do Before Opening Walls
Start at the water meter. With all fixtures off, watch the small leak indicator for a few minutes. Any steady movement suggests flow. Next, isolate: close the house main shutoff at the entry point or in the basement, then recheck the meter. If the indicator stops, the leak is inside the house; if not, suspect the service line between the meter and the foundation. A simple pressure gauge on a hose bib can reveal if static pressure is high enough to stress joints; most homes are comfortable around 50 to 60 psi. Add a few dye tabs to a toilet tank and wait 10 minutes; color appearing in the bowl points to a leaking flapper, which adds cost and can saturate flooring if the toilet occasionally overflows.
Use a flashlight to inspect under sink traps, dishwasher supply connections, and the water heater pan. Feel below angle stops and along braided stainless hoses for moisture. Look in the crawlspace for fresh drips on vapor barrier plastic and for damp insulation around hot water lines. Avoid pushing on suspect areas of drywall; bulges can conceal pooled water, and probing can release it unexpectedly. If any area is near wiring or outlets, stop and wait for a professional rather than risking shock.
-
When to Act Fast and What to Prioritize
There are several red flags that justify an immediate response: a rapidly spinning meter, a hissing sound at a wall when no fixtures are running, a warm area on a slab floor, bulging drywall, or water wicking across hardwood seams. Turn off the house side main shutoff, usually located where the service enters the basement or crawlspace. Avoid operating the street side curb stop in the meter box unless instructed by your utility; those valves can be fragile and require a special key. If a leak is near the electrical service, leave the area and wait for help.
Some decisions involve trade offs. Lowering pressure with a new PRV reduces strain on supply lines and cuts water hammer, but showers may feel less forceful until aerators are cleaned or shower heads are updated. Patching one pinhole in a copper run is inexpensive, yet frequent pinholes may indicate systemic corrosion and point to partial repiping with PEX or copper. Opening a ceiling for visual confirmation is faster than booking acoustic or thermal imaging, but noninvasive leak detection can reduce unnecessary demolition, especially in tiled bathrooms.
Common Mistakes That Make Leaks Worse
Partially closing a main shutoff to slow a leak can create pressure drops and debris movement that clog aerators and cartridge screens, masking the real problem for weeks. Mixing galvanized and copper without proper dielectric unions can accelerate corrosion at the junction, leading to new leaks shortly after a repair. Another frequent error is overtightening packing nuts on old angle stops; the short term drip might stop, but the valve body can crack later. Using non rated hoses for washing machines or leaving rubber supply lines in place for years also invites failure, often when the machine is filling.
Confusing condensation for a leak is also common. Cold water lines can sweat in humid bathrooms or basements. Wrap a small section with a dry paper towel and wait. If the towel stays dry but the pipe feels wet elsewhere, you likely have condensation that calls for pipe insulation, a bath fan check, or a dehumidifier. If the towel becomes damp at the wrap, suspect an actual leak rather than sweat.
Preventing the Next Leak in Our Wet, Cool Climate
Prevention starts with stable pressure and updated connectors. Check or replace an aging PRV and target static pressure near 50 to 60 psi. Install water hammer arrestors at quick closing fixtures like the washing machine. Replace rubber washer hoses with braided stainless lines and refresh faucet and toilet supply lines that feel kinked, brittle, or undersized. Insulate pipes in unconditioned spaces, especially near crawlspace vents and garage walls. Consider frost proof hose bibs with proper pitch, and shut off and drain exterior spigots before hard freezes. Place leak sensors under the water heater and kitchen sink, and make sure the water heater has a functioning temperature and pressure relief (TPR) valve with a visible discharge line to a safe location.
Moisture management around the structure also matters. Clear gutters and downspouts so roof water does not saturate the foundation and crawlspace, which can disguise plumbing leaks and complicate diagnosis. Confirm that yard grading moves water away from the house. In older homes, periodic inspection of toilet stability and recaulking at tub and shower surrounds can keep splash water from traveling behind finishes. If you plan a remodel, budget for replacing old angle stops and supply lines while walls are open and consider upgrading risers and manifold layouts that improve access and reduce future leak points.
Hidden leaks rarely announce themselves with a steady drip in plain sight. Instead, they whisper through a spinning meter, a musty cabinet, or a ceiling stain that refuses to dry. A few targeted checks can separate condensation from active leaks, pinpoint whether the problem is inside or between the meter and foundation, and help you decide what to fix first. Acting early often turns a half day repair into a contained fix instead of a larger restoration project. When in doubt, shut off water at the house side valve, document what you see, and get qualified help before opening finishes.
